
What’s this about?

This site is an official rules reference for Sleeping Gods: Distant Skies by Red Raven Games.
It’s great for finding a specific rule quickly. It’s also an excellent supplement to the rulebook included in the box, when watching a how-to-play video, or while teaching the game.
Usage Tips
Back & Forward Nav: Think of each rule entry as a separate webpage. If you want to jump back, hit your Back button.
Check the Index : Don’t see what you’re looking for? The Index has every term in the game.
Install it: This site is a (Progressive Web App). You can install it as a standalone app that is lightning fast, and works even when you’re offline.
Link to a rule: Want to share a link to a particular rule? Just click its title!
Credits
- Game Design
- Ryan Laukat
- Illustration and Graphic Design
- Ryan Laukat
- Story and World
- Ryan Laukat
- Writing
- Ryan Laukat, Brenna Asplund, Malorie Laukat
- Editor
- Malorie Laukat
- Game Development
- Ryan Laukat & Malorie Laukat
- Additional Development
- Brenna Asplund
- 3D Sculptor
- Francesco Orrù
- Proofreading
- Malorie Laukat, Brenna Asplund, Diana Parkin
- Rulebook
- Ryan Laukat
- Introduction Comic Book
- Ryan Laukat
- Play testers
- Malorie Laukat, Cid Laukat, Jamey Laukat, Brenna Asplund, T. Alex Davis, Sean Bean, Tynley Bean, October Bean, Boston Bean, Sara Mosley, Rigo Melendez, Jaden Larson, Derek Larson, Jameson Tanner, Chad Samuelson, John Carwell, Michael Christenson, Shauna Christenson, Tyler Moyes, Bryan Jones, Travis Triggs, Josh Richens, Joseph Richens, Noah Ogden, Ethan Moyes, Kaden Love, Jeremy Pettersson, Shellie Piquet, Riley Richards, Heber Hernandez, Preston Ward, Paul Ward, Matt Freebarn, Adam Freebarn, Ben Andrus, Dakota Warner, Russ Love, Chelsie Burgess, Jason Lyons, Brianne Weber, Trent Egbert, Kyle Stubbs, Jeffrey Torruellas, Merrill White, Mark Jensen, Brie Jensen, Kyle Passey, Lucas Walton, Travis Walton, Ashley Sandberg, Jeff Sandberg, Sam Clement, Amy Clement, Mark Petersen, Caleb Petersen, Eli Petersen, Caleb Allred, Bryce Jarrett, Jalin Stockdale, Bethany Stockdale, Kevin Tek, Ryan Baker, Reese Ferguson, Jackson Probst, Braden Probst, Royce Severson, Jonathan Ence, Lance Grange, Leland Liu, Jeff Ribeira, Nathan Huff, Jenna Huff, Peter Saindon, Justin Wall
- Last checked
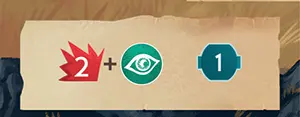
Ability Cost
Abilities that require stamina, resources, or losing health to activate have a white arrow between the cost (on the left side) and the effect (right side).
Abilities that do not have a white arrow do not cost anything to activate. Follow their instructions any time their effects apply.
Ability card abilities and adventure cards each have additional rules about ability costs.
Ability Cards
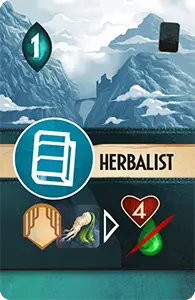
- Fate number. When drawing fate, check this number, then discard the card.
- Cost. Starting cost to equip (see below).
- Skill. This card gives +1 SAVVY when equipped. It can also be discarded from your hand to add +1 to a SAVVY challenge.
- Ability. When this card is equipped, the character may, at any time, spend 1 stamina and 1 ogroot to activate this ability, which restores 4 total health to any character (or split between multiple characters). It also removes 1 venom from any character.
Ability cards are used in three ways:
- Determine success or failure when you draw fate
- Discard from your hand to aid in challenges
- Equip to characters to add to their skills and gain additional abilities
Gaining Ability Cards
At the start of your turn, draw 32 ability cards. If, after drawing, you have more than 7 ability cards in hand, discard until you have no more than 7 (each player has their own hand limit).
If you run out of ability cards to draw, shuffle the discard pile and make a new pile. If there are no ability cards left at all because they are either equipped or in players’ hands, every player must immediately discard all their ability cards in hand except 1 to make a new ability card draw deck.
Players keep their ability cards in hand secret until they are played. They do not show them or give them to other players, but they can tell other players if they have something in hand that could help during a challenge.
Discarding to Aid in Challenges
You may discard ability cards from your hand during any challenge matching the appropriate skill (even a challenge on another player’s turn) to increase the result by 1 per card discarded. However, ability cards are most useful when used to equip cards to characters, so do this rarely. Discarding ability cards only works in challenges; you may not discard ability cards to boost combat cards, adventure cards, or other abilities.
Equipping Ability Cards

Example: equipping ability cards
At any time, even in the middle of another action or on another player’s turn, you can equip ability cards to any character you control. To do this, discard ability cards from you hand equal to the cost of the card you want to equip (top right corner). You must also discard one extra card for each ability card already equipped to the character that has the same skill symbol as the card you are now equipping. Each equipped card increases the character’s skill number by 1 in the type shown on the card. Each character can have a total of 8 equipped ability cards at once. You may discard equipped ability cards from your character(s) at any time.
Ability Card Abilities
Ability card abilities can only be used once they are equipped to a character.
Ability effects can be applied to any character at any time unless the card specifies “this character” or “self,” in which case the effects can only be applied to or used by the character that has the equipped card. The player that controls the character always decides when to use their equipped abilities.
If an ability says the word “you” it means the player that controls the character.
Damage ![]() and remove power
and remove power ![]() symbols add to any combat card unless indicated by the words “self” or “this character,” in which case they can only add to an attack by a character that the ability card is equipped to.
symbols add to any combat card unless indicated by the words “self” or “this character,” in which case they can only add to an attack by a character that the ability card is equipped to.
If a remove power or damage ability says, “Not an attack,” it means that it can be performed at any time during combat and does not trigger a counterattack from an enemy. It is performed separately from a combat card, although you must follow adjacency rules when placing damage this way.
Cost to Activate
Abilities that require stamina, resources, or losing health to activate have a white arrow between the cost (on the left side) and the effect (right side). Stamina and health costs must always be paid by the character that the ability card is equipped to.
Abilities that do not have a white arrow do not cost anything to activate once equipped. Follow their instructions any time their effects apply.
Examples
Click on the examples below for details.
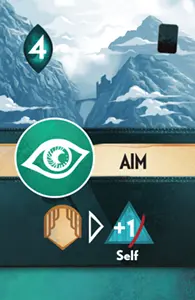
- Aim. When this character plays a combat card with remove power, they may spend 1 stamina to increase the amount of power removed by 1.
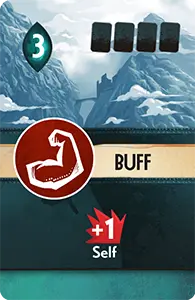
- Buff adds 1 damage to all combat cards played by this character that deal damage. It does not add damage to combat cards that do not deal damage.
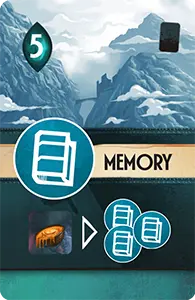
- Memory. To activate this ability, return 1 sand honey to the supply. This gives you 3 temporary SAVVY to use in a challenge or to boost a combat card.
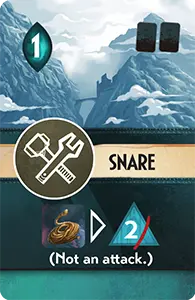
- Snare has a “remove 2 power” effect. This ability is not added to combat cards. It activates separately and does not trigger a counterattack like a combat card does.
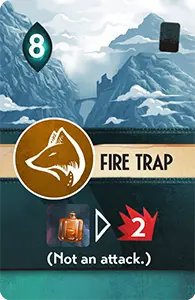
- Fire Trap has a “2 damage” effect. This ability is not added to combat cards. It activates separately and does not trigger a counterattack like a combat card does.
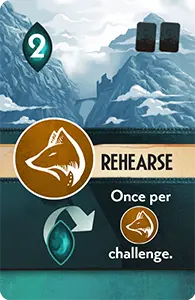
- Rehearse. You may use this ability any time the characters are involved in a CUNNING challenge. The player that controls this character chooses whether to use it or not.
Achievements
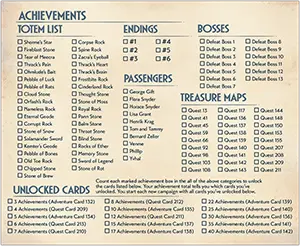
Achievement Sheet
Whenever you restore a dormant totem and gain the associated adventure card, mark the appropriate box on the achievement sheet. When you complete various campaign endings, defeat bosses, find passengers, or complete treasure maps, mark the specified boxes on the achievement sheet. Each box (except the unlocked cards themselves) is an achievement. As you complete achievements, you gain “unlocked cards”.
Unlocked Cards
Unlocked cards are specific cards in the quest or adventure card deck. Mark the unlocked cards you achieve when you have the specified number of achievements.
Example: To gain the unlocked card “Adventure Card 132,” you would need to have completed a minimum of 3 achievements, such as Defeat Boss 10, George Gift, and Eternal Geode Totem.
Each time you start a new campaign, check the achievement sheet to see which unlocked cards you start with. You do not gain these cards during a campaign, only when you start a new campaign.
Once you have gained an unlocked card, it forever remains “unlocked” and you can use it in all future campaigns. Store it with your starting cards. You may choose which unlocked cards to use at the start of each campaign.
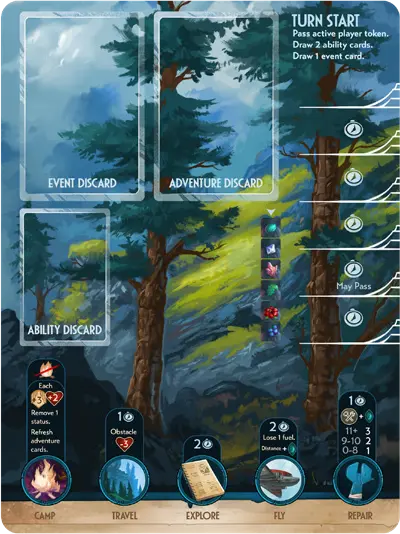
Actions
In step 3 of your turn, you choose actions. You may choose the same action more than once per turn. Each action (except camp) costs 1 or 2 time. A normal turn consists of 5 time.
You may choose from 5 possible actions on your turn.
Spending Time
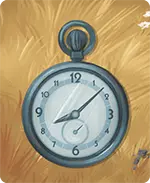
Pocket Watch
When you spend time, move the pocket watch down on the time track. The pocket watch starts on the “turn start” section of the track, then moves down for each time spent.
If a player passed early on the previous turn, that means you have one extra time to use on your turn (use the bonus time token as a reminder that you have one extra time to use). Before using the bonus time token, you must have already completed steps 1 and 2 of your turn as normal.
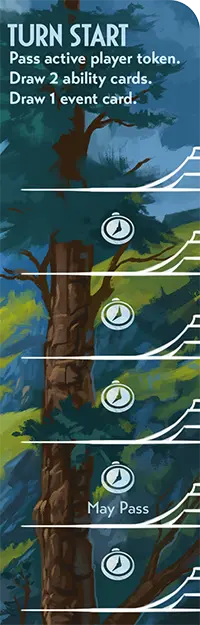
Start here.
Move the pocket watch down on the track when you spend time.
You may end your turn when on this space if you want. If you do, give the next player the bonus time token and move to step 4.
After completing your final action, if the pocket watch is on this space, move to step 4 to end your turn.
Active Player
Active Player Token
When it is your turn, you are the active player.
Claire Smith is always controlled by the active player.
The active player is the often final decision maker for things like how damage or status effects are distributed.
At the end of your turn, pass the active player token to the player on the left. That player is now the active player.
Adding or Removing Players
You can add or remove players at the end of any turn.
Remove a player
After the current turn ends, assign the character board(s) to the remaining players as evenly as possible (except Claire Smith, who is always controlled by the active player). Distribute the player’s ability cards and adventure cards in hand among the other players.
Add a player
If playing solo, give the new player 2 of the character boards (not Claire Smith’s board). Randomly give the new player half of your adventure cards and ability cards in hand.
If playing with more than one player, give the new player one of the character boards (not Claire Smith’s board) controlled by a player that currently controls 2 characters. Shuffle all adventure cards in hand and ability cards in hand from all players and deal them out as evenly as possible to each player.
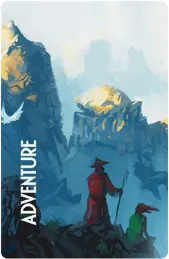
Adventure Cards
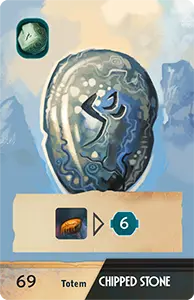
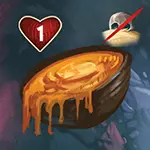
- This icon indicates that this adventure card is a restored totem. One of your goals in the game is to obtain as many of these as possible.
- Ability that costs 1 sand honey and gives a character 6 temporary block against 1 counterattack.
- Number. An “S” in the bottom left corner indicates that it is a “starting” adventure card.
- Type
- Name
Adventure cards represent the people, equipment, knowledge, and totems you find on your journey. When you gain an adventure card, put it in your hand or give it to another player. There is no adventure card hand limit.
Adventure cards can be played from your hand at any time to activate their abilities. When you play an adventure card, place it in the adventure card discard pile on the action board.
You may not give adventure cards from your hand to other players, but you may play an adventure card on any player’s turn and on any player’s character(s).
While in combat, you cannot play recipes, cards that allow you to move on the atlas, or cards that move the plane.
If there is a slash between various abilities on the card, you must choose one of them when you play the card.
Cost to Activate
Abilities on adventure cards that require payment of something to activate (usually a resource) have an arrow between the cost (left side) and the effect (right side). You must pay the cost when you play the card. If you cannot pay the cost, you cannot play the card.
Abilities that do not have an arrow between cost and effect do not cost anything to activate when played. Some, however, do list specific requirements. If you can’t meet the requirements, you can’t play the card.
Click on the examples below for details.
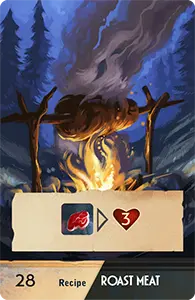
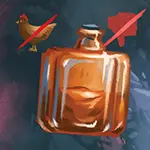
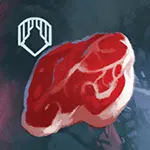
- Roast Meat. This is a recipe. When you play this card, you must discard 1 meat token to restore 3 health (split between characters according to your preference).
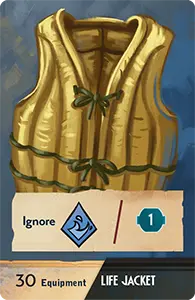
- Life Jacket. When you play this card, you may immediately either ignore 1 water obstacle OR block 1 damage. Block can only be used in combat to ignore damage from enemy counterattacks.
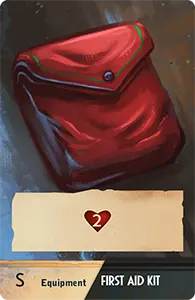
- First Aid Kit. When you play this card, restore 2 health (split between characters according to your preference).
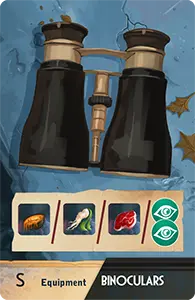
- Binoculars. When you play this card, choose to gain either 1 sand honey, 1 ogroot, 1 meat, OR 2 perception (to use in a challenge or boost a combat card).
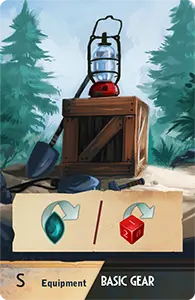
- Basic Gear. When you play this card, you may either redraw fate (left icon) OR reroll a combat die (right icon).
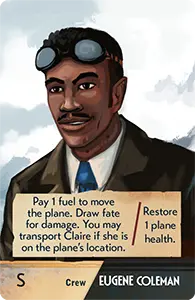
- Eugene Coleman. When you play Eugene’s card, you may move the plane on the flight board OR restore 1 plane health. If you move the plane, lose 1 fuel and draw fate to check for plane damage as normal, but pay no time. You may fly without Claire.

- Fishing Pole. The fishing pole has an obstacle icon but it cannot be used to ignore treacherous waters.
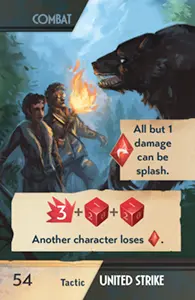
- United Strike. This combat card can be played even if another character doesn't have synergy to lose.
Anytime Actions
At any time, you can:
- Camp
- …except during an action that takes time
- Equip an ability card
- Activate or discard an equipped ability card
- Complete an "ongoing" or "turn end" event
- Refuel the plane
- …if the plane is on the Geysers landing place
- Activate a character ability
- Play an adventure card to activate its ability
- …except some cards during combat: no recipes, moving on the atlas, or moving the airplane
- Discard a resource to activate its ability
- Discard quest resources to restore a dormant totem
- Customize your combat deck
- …except during combat rounds
- Discard an unused synergy token
- Change the game’s difficulty level
Attack & Counterattack Combat Round, Step 1
Example: combat
In any order, each player plays exactly 1 combat card on each character they control (not counting Claire Smith), for a total of 4 cards. The player that controls Claire Smith may choose to play a card on her rather than another character they control.
Players can choose to move to the end of round phase even if they haven’t played 4 combat cards.
Each combat card is followed by a counterattack from a targeted enemy.
-
Play a combat card on a character you control (that isn’t at 0 health and hasn’t yet attacked this combat round). The character will now use the card’s abilities to attack an enemy.
-
Choose an enemy card to be the target of the attack.
-
Activate each of the combat card’s effects in any order. Combat card effects include:
-
Counterattack: After you attack, the enemy counterattacks immediately (even if you covered its last heart). It deals damage equal to its basic attack damage plus the number of wooden power tokens it has (do not count enemy power growth symbols on the bottom of the card). Mark this damage on the character who attacked. Apply any block from the combat card you used, which lets you ignore 1 damage per 1 block. You may also use block from adventure cards and character abilities at this time. If the character runs out of health during a counterattack, any remaining damage is ignored.
-
If every square containing a heart symbol is covered, the enemy is defeated. Return the defeated card to the enemy deck and slide any remaining enemy cards together so that they are adjacent.
After all combat cards have been played, move on to step 2, End of Round (Enemy Phase).
Block
Block allows characters to ignore the specified number of damage from the enemy’s counterattack.
Block protects enemies from character attacks — when a character targets an enemy with a combat card. It does not protect enemies from splash damage or “Not an attack” damage abilities.
Bosses
Sometimes the storybook will tell you to fight a boss. Instead of using enemy cards, each boss is an entire page in the storybook. All combat rules are the same, except for a few differences.
Each boss is separated into 3 or 4 zones, divided by large lines and labeled. Treat these zones as separate enemy cards. For example, each time you attack, choose a zone as the target. That zone counterattacks based on its damage and power tokens. Each zone has separate power tokens.
When you cover all hearts in a zone, the zone is not “defeated.” All uncovered enemy abilities (including end of round abilities) in the zone still apply until all hearts on the entire boss have been covered.
Splash damage can be placed on adjacent squares in different zones.
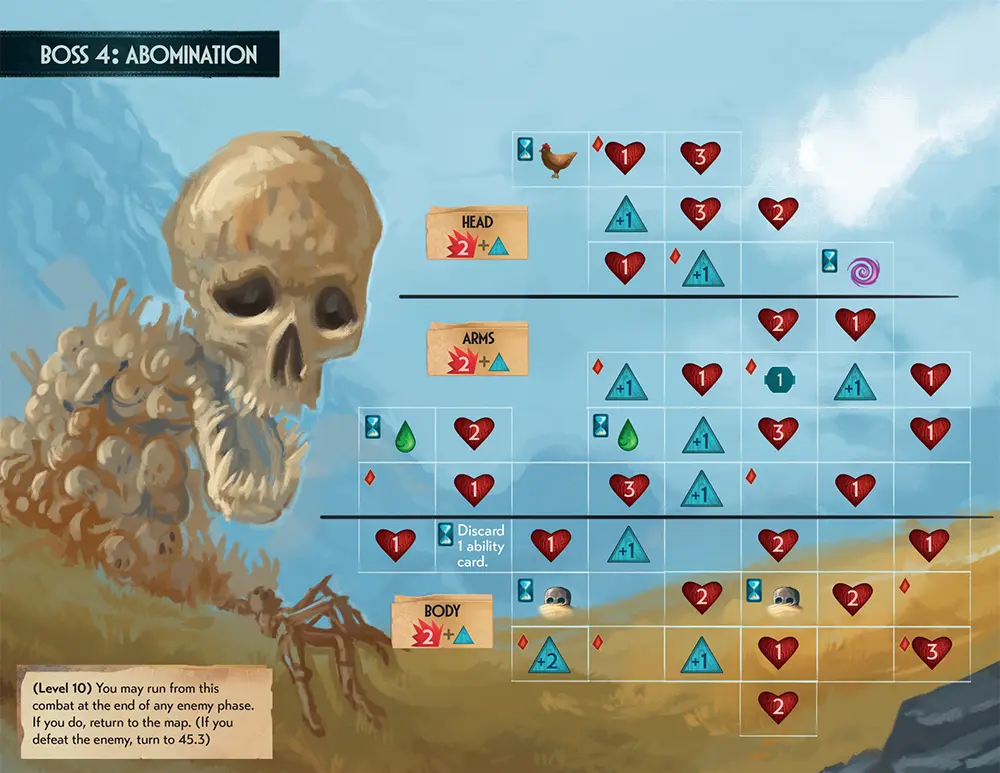
- Zone Line
- Zone and Counterattack Damage
Action: Camp
The camp action costs no time. Instead, you must cross off one of the camp symbols on your journey log, starting with the left most symbol.
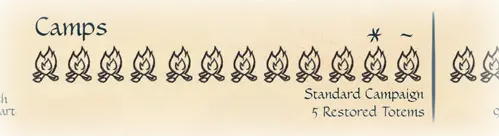
You have a limited supply of camps before the campaign ends. When you cross off these last two camps, follow the specified instructions listed at the bottom of the journey log.
You may camp anywhere and at any time as long as you’re not in the middle of another action (such as an explore action).
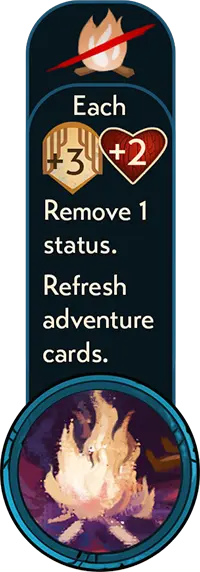
When you camp:
- Cross off one of the camp symbols on your journey log.
- Each character regains their stamina tokens (3 max).
- Each character restores 62 health (limited to their max).
- You may remove 1 status effect from 1 character.
-
Shuffle the discard pile of adventure cards and deal them out to the players one card at a time, clockwise, starting with you, until you run out of cards.
Note: This does not include combat cards, which are only used during combat. Combat cards stay in their own deck until combat.
Challenge Overview
A challenge is a test of skill that you must overcome.
- Gather crew
- All players decide if any characters they control will participate.
- Each participating character must spend 1 stamina and have at least 1 health.
- Determine total skill number
- Alter Fate
- You may use character abilities, adventure cards, and equipped ability card abilities that affect the fate draw.
- Any player may discard ability cards in hand that have a matching skill to add +1 to the skill number.
- Determine success or failure
- Success: Final skill number is equal to or greater than the challenge number.
- Failure: Final skill number is equal to or less than the challenge number.
Challenges
A challenge is a test of skill that you must overcome. Each challenge is associated with one of the 6 skills:
In a challenge, you spend stamina from characters to gain their skills, draw fate, and use abilities to try to reachsurpass a specified challenge number.
A basic challenge looks like this:
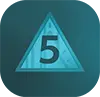
STRENGTH 5
Fail: −3 health
In this example, you must achieve a total of 56 strength or higher. If you fail, you take the failure consequence.
To overcome a challenge, follow these steps:
Example: challenge
-
Decide which of your characters will participate (from characters that you control). Other players may choose to have their character(s) participate. Each participating character must spend 1 stamina. If a character cannot spend a stamina, they cannot participate.
Important: You can choose to have no characters participate and simply move on to the next step. Sometimes this is a useful strategy if you can afford the failure consequences and don’t want to use up all your stamina.
Determine the sum of the appropriate skill on participating characters (which is their basic skill plus any relevant equipped ability cards they have) and move to the next step.
-
Draw fate by drawing a card from the ability deck and checking the fate number in the top left corner of the card. Add the participating characters’ skills to this number. The resulting number is your total skill for this challenge.
-
You may now activate character abilities, adventure cards, and equipped ability card abilities to alter the outcomes of the fate draw. Any player may also discard ability cards from their hand to give +1 skill of the type specified on the card. Players may discard any number of ability cards.
-
Check the final skill number against the challenge number. If the final skill number is equal to or greater than the required challenge number, you succeed. Otherwise, you fail and must take consequences.
-
Discard the ability card used for drawing fate.
Success
If you obtain a high enough skill number, ignore any listed failure consequences. Read the next line and follow the instructions.
Failure
If you fail, you take the consequences. If this includes damage, assign the damage first to the characters that participated (if able), splitting it according to your preference. Most of the time, even if you fail, you gain the rewards and move forward with the story.
Changes from Sleeping Gods
If you’ve played Sleeping Gods, you’ll recognize many of the concepts and systems here, but some things have changed in Distant Skies.
Here’s what’s new or different:
Moxie
This new skill represents a character’s ability to withstand stress, intimidate others, overcome fear, or act with boldness.
No Ship Actions
There are no ship actions in this game.
Time Track and Actions
Instead of taking two actions each turn, you now spend time to take actions. Each turn consists of 5 time, and most actions cost between 1 or 2 time.
Camp Instead of Port
Visiting a port has been replaced by the new camp action. You may camp anywhere and at any time (except in the middle of another action). Camping does not cost time, but it does require you to cross off a camp icon on your journey log sheet. You have a limited number of camps before the game ends, so you must use these wisely.
No Command
There are no command tokens in the game. Players no longer need to spend command to participate in challenges on other players’ turns.
Stamina Replaces Fatigue
Characters no longer gain fatigue. Each character has up to 3 stamina tokens that they can spend to activate abilities and participate in challenges.
Status Effect Changes
Madness and low morale have changed.
Combat
Combat is based on the system in Sleeping Gods, but has a few changes.
- Players no longer equip weapon cards to specific characters. Instead, players use a deck of combat cards (a specific type of adventure card). Each combat round, 4 combat cards are played to deal damage to enemies and more.
- Accuracy has been removed. All attacks hit.
- Enemies have a new resource called “power.” When an enemy counterattacks, it deals damage equal to its base attack plus the number of power tokens on the card.
- Enemies counterattack when they are attacked, even if you covered their last heart. They do not attack at the end of each combat round, but they do activate their end-of-round abilities.
- Synergy tokens with specific characters have been replaced by basic synergy tokens (wood). They can be given to any character and used to strengthen certain combat cards when played.
- Enemy attack damage no longer “spills over” onto other characters. If a character reaches 0 health, the rest of the counterattack damage is ignored.
Ability Cards
Players equip ability cards to characters by discarding other ability cards in hand instead of spending command. There are no level cards in the game, but equipped ability cards are never discarded unless you choose to discard them. In Distant Skies, you may only equip ability cards to characters you control (not any character).
Fate
When drawing fate, the numbers are now between 1 and 8.
Adventure Cards in Hand
Players now keep adventure cards in their hands. They do not require command to activate. When a player plays an adventure card, they place it in the adventure card discard pile. When players camp, they shuffle the adventure discard pile and distribute the cards to the players as evenly as possible.
Characters
You always control at least 1 character. When you are the active player, you also control Claire Smith. Claire is the POV character in the storybook and the main protagonist. Depending on the player count, you may control more than 1 character.

- Stamina. Characters spend stamina to participate in challenges and activate their abilities. Each character can have a maximum of 3 stamina at one time.
- Name and Origin
- Basic Skills
- Character Abilities. See below for details.
- Health Track. Use a damage token to track a character’s current health.
- Zero Health. Remember that it costs 1 time to recover from zero health.
Character Abilities
Each character has 1 or 2 abilities on their character board. You may activate any abilities on a character you control at any time by spending stamina from the character.
Claire
- Spend 1 stamina to reroll a combat die (or let any other character reroll their combat die).
- Spend 1 stamina to draw 1 combat card. Then discard 1 combat card.
Ed
- Spend 1 stamina to redraw fate on any player’s turn. This can only be used once per turn.
- Spend 1 stamina to gain a temporary strength or cunning during a challenge, or to boost a combat card.
Ezarius
- Spend 2 stamina to remove frightened from any character.
- Spend 1 stamina to remove 1 power from any enemy. This does not trigger an enemy counterattack.
Jessie
- Spend 1 stamina to give any character 1 block during an enemy counterattack.
- Spend 2 stamina to remove low morale from any character.
Miguel
Combat
Set up
To set up combat…
- Retrieve listed enemy cards.
- Lay them out, face up, edge to edge, in random order.
- Place power tokens on each enemy equal its
 total.
 - You may customize your combat deck now.
- Shuffle your combat deck.
- Each player draws 1 combat card plus one for each character they control (excluding Claire Smith).
Combat rounds continue until either all enemies or you are defeated.
-
Attack & Counterattack — play up to 4 combat cards…
- Play a combat card on a character you
control
- Cannot be at 0 health
- Cannot have already attacked this round
- Choose an enemy to be the target of the attack
- Activate the combat card’s effects in any order, including…
- Counterattack
- The targeted enemy deals damage to its attacker
- This occurs even if all enemy hearts are covered
- Damage equals basic attack damage plus current power
- Reduce damage by block (from the played combat card, character abilities, equipped ability cards, adventure cards)
- If the character is reduced to 0 health, excess damage is ignored
- If all enemy hearts are covered, the enemy is defeated
- Play a combat card on a character you
control
- Enemy Phase — after all combat cards are played, discard them and activate each remaining enemy from left to right…
- Gain power equal to uncovered add power symbols
 Activate uncovered end of round abilities
- The active player decides which character is targeted by each enemy ability
If any enemies remain, replace discarded combat cards (shuffle discards to form a new deck if necessary), and start a new combat round.
Combat Cards
Combat cards are a type of adventure card, but they are only used in combat. You start with a deck of 14 cards, but will find many more as you play the game.
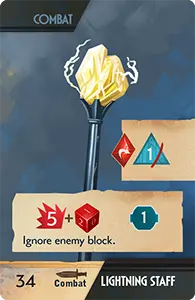
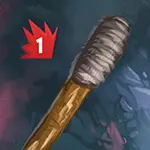
- Combat Card indicator.
- Ability. When you play this on a character, choose 1 enemy card as a target before you roll. This particular attack deals 5 damage plus the result on a combat die roll, and ignores enemy block.
- Synergy Ability. When you play this card on a character, you can activate this ability (in addition to the other effects on the card) by spending a synergy token from the character. Each synergy ability can only be activated once each time you play the card. Otherwise, ignore this section.
- Remove Power symbol, which lets you remove 1 power token from the target enemy.
- Block, which allows you to ignore 1 damage from the targeted enemy’s counterattack.
- Adventure card number. An “S” in the bottom left corner indicates that it is a “starting” adventure card.
- Name
Customizing the Combat Deck
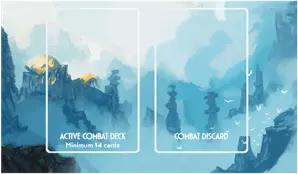
Keep the active deck on the combat deck board. Keep any unused combat cards you own near the combat deck board.
Your active combat deck is the deck of cards you use in combat. It must be at least 14 cards, but it can be larger if you choose.
At any time outside of combat, you may look through combat cards you own and choose which of your combat cards are included in your active combat deck. Players decide together which cards are in the deck, although the active player has final say. You may customize this deck after combat setup, but not after making your first attack.
Combat Setup
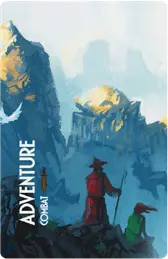
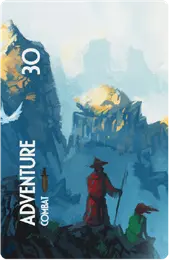
When a story section includes the word COMBAT, followed by a list of numbers, you must start combat and defeat enemies before you can continue your story. Follow these steps to set up combat.
Retrieve the listed enemy cards from the enemy deck. The deck should be in order, face down. Look through the cards until you find the listed numbers. (Do not look at the fronts of the other cards in the deck, only the backs.) Shuffle the cards you just retrieved and place them face up in a row in the center of the table, without any space between cards. (You may place these on the atlas if there isn’t room on the table.) Each enemy card starts with power tokens equal to the “add power” symbols on the card minus one. Place these tokens on the picture area of the card.
- Shuffle the deck of enemy buff cards and deal 1 card to each enemy.
Shuffle the active combat deck. The deck must be at least 14 cards, and you cannot customize the deck (add unused combat cards you own to the deck) during combat. You can, however, customize the deck right before starting combat.
Each player draws 1 combat card PLUS 1 for each character they control (do not count Claire Smith).
Components
-
 Starting Adventure Cards
-
 Starting Combat Cards
-
 Adventure Cards
-
 Quest Cards
-
Ability Cards
-
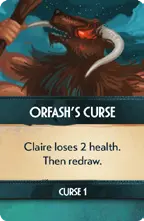 Orfash Curse Cards
-
 Enemy Buff Cards
-
 Enemy Cards
-
 Event Cards
-
 Action Board
-
 Atlas
Atlas
-
 Storybook
-
 Flight Board
-
Combat Deck Board
-
Character Boards
-
 Character Standees
-
 Airplane Card
-
Active Player Token
-
 Airplane Figure
-
 Claire Smith Figure
-
 Combat Die
-
 Common Resources
-
 Quest Resources
-
Damage tokens
-
Pocket Watch
-
 Bonus Time Token
-
 Power Tokens
-
 5-Value Power Tokens
-
 Stamina Tokens
-
 Status Tokens
-
 Synergy Tokens
-
 Airplane Token
-
 Helthark Token
-
 Journey Log
-
Achievement Sheet
Detailed Components List
- Rule Book (×1)
- Storybook (×1)
- Journey Log Sheet Pad (×1)
- Achievement Sheet (×1)
- Atlas (×1)
- Introduction Comic Book (×1)
- Magnetic Card Box (×1)
- Foam Block (×1)
- Combat Tray with Lid (×1)
- Completed Quest Box (×1)
- Plastic Insert (×1)
- Flight Board (×1)
- Action Board (×1)
- Combat Deck Board (×1)
- Character Boards (×5)
- Claire Smith (×1)
- Miguel Castillo (×1)
- Jessie Wilder (×1)
- Ezarius Nel (×1)
- Ed Lau (×1)
- Airplane Card (cardboard) (×1)
- Plastic Sliders (×2)
- Airplane Token (×1)
- Helthark Token (×1)
- Bonus Time Token (×1)
- Pocket Watch (×1)
- Character Standees (×5)
- Claire Smith (×1)
- Miguel Castillo (×1)
- Jessie Wilder (×1)
- Ezarius Nel (×1)
- Ed Lau (×1)
- 5-Value Power Tokens (×5)
- Active Player Token (×1)
- Status Tokens (×25)
- Weakened (×5)
- Madness (×5)
- Frightened (×5)
- Venom (×5)
- Low Morale (×5)
- Stamina Tokens (×15)
- Common Resources (×36)
- Ogroot (×6)
- Whiskey (×6)
- Torch (×6)
- Sand Honey (×6)
- Rope (×6)
- Meat (×6)
- Quest Resources (×42)
- Tundra Berry (×7)
- Bloodflower (×7)
- Gergon Leaf (×7)
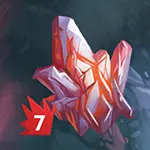
- Fire Quartz (×7)
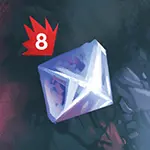
- Ice Diamond (×7)
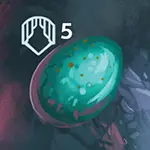
- Jadeworm Egg (×7)
- Damage Tokens (wood) (×50)
- Power Tokens (wood) (×20)
- Synergy Tokens (wood) (×5)
- Plastic Stands (×8)
- Airplane Figure (plastic) (×1)
- Claire Smith Figure (plastic) (×1)
- Combat Die (×1)
- Starting Adventure Cards (×6)
- First Aid Kit (×1)
- Stew (×1)
- Binoculars (×1)
- Meecra’s Aid (×1)
- Eugene Coleman (×1)
- Basic Gear (×1)
- Starting Combat Cards (×14)
- Disorient (×1)
- Pistol (×2)
- Baseball Bat (×1)
- Machete (×1)
- Whip (×1)
- Wrench (×1)
- Hidden Strike (×1)
- Mad Charge (×1)
- Flank (×1)
- Precise Strike (×1)
- Whirlwind Hit (×1)
- Taunt (×1)
- Double Punch (×1)
- Adventure Cards (×142)
- Unique numbered cards, 1–142
- Quest Cards (×214)
- Unique numbered cards, 1–214
- Enemy Cards (×73)
- Unique numbered cards, 1–73
- Event Cards (×56)
- Level 1 Cards (×25)
- Ambrosia the Cat (counts as Lv. 1) (×1)
- Nightly Haunts (×1)
- Northern Transport (×1)
- Cargo Delivery (Thistletown) (×1)
- Cargo Delivery (Milius Town) (×1)
- Plane Raiders (×1)
- Cargo Delivery (Stormlock City) (×1)
- Bounty Hunger (×1)
- Abandoned Hideout (×1)
- Relentless Hung (×1)
- Fuel Merchants (×2)
- Root Growers (×1)
- Deer (×1)
- Harkian Traders (×1)
- Wolverines (×1)
- Twisted Ankle (×1)
- Food Poisoning (×1)
- Poison Ivy (×1)
- Merchant Flight (×1)
- Liquor Flight (×1)
- Spirit Wachers (×1)
- Spider Nests (×1)
- Possessed Travelers (×1)
- Impending Rockslide (×1)
- Level 2 Cards (×18)
- Plane Frost (×1)
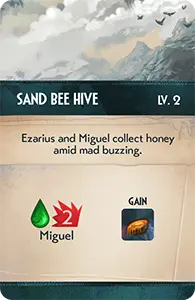
- Sand Bee Hive (×1)
- Argument (×1)
- Hunting Helthark (×3)
- Vulture (×1)
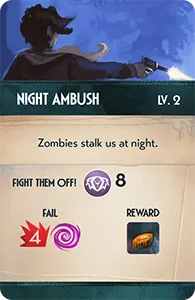
- Night Ambush (×1)
- Raiding Raccoons (×1)
- Raiding Rats (×1)
- Irontooth Bats (×1)
- Spider Bite (×1)
- Stalking Wolf (×1)
- Geyser Burn (×1)
- Toothache (×1)
- Miguel’s Nightmares (×1)
- Terrifying Voices (×1)
- Broken Equipment (×1)
- Level 3 Cards (×13)
- Curse of Thrack (×1)
- Greed of Zacra (×1)
- Broken Weapons (×1)
- Ofash Cultists (×1)
- Frost (×1)
- Something Hunts Us (×1)
- Fiery Fever (×1)
- Snowstorm (×1)
- Bear Break-in (×1)
- Lightning Storm (×1)
- Bug Bites (×1)
- Stalking Bandits (×1)
- Maddening Cloud (×1)
- Level 1 Cards (×25)
- Ability Cards (×62)
- Buff (Fate 1) (×1)
- Buff (Fate 3) (×1)
- Nimble (×1)
- Exploit (×1)
- Sneak Attack (×1)
- Dodge (×1)
- Guts (×1)
- Inventive (×1)
- Wild (×1)
- Bear Nose (×1)
- Gear Head (×1)
- Council (×1)
- Squad Tactics (×1)
- Rehearse (×1)
- Quick (×1)
- Immunity (×1)
- Builder (×1)
- Gifted (×1)
- Knot Expert (×1)
- Sharp Wit (×1)
- Fire Trap (Fate 8) (×1)
- Fire Trap (Fate 6) (×1)
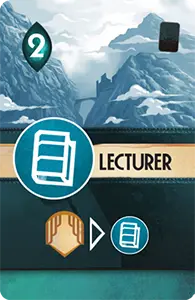
- Lecturer (×1)
- Cornered (×1)
- Lucky (×1)
- Reckless (×1)
- Bushcraft (×1)
- Accurate (×1)
- Tough (×1)
- Herbalist (×1)
- Alert (×1)
- Studious (×1)
- Encourage (×1)
- Shrug Off (×1)
- Deception (×1)
- Lionheart (×1)
- Bandage (×1)
- Prepared (×1)
- Makeshift (×1)
- Scout (×1)
- Hawk-Eyed (×1)
- Meditate (×1)
- Battle Cry (×1)
- Riposte (×1)
- Endurance (×1)
- Bold (×1)
- Bandage (×1)
- Solid (×1)
- Adroit (×1)
- Daring (×1)
- Aim (Fate 4) (×1)
- Aim (Fate 5) (×1)
- First Aid (×1)
- Dexterous (×1)
- Strain (×1)
- Entrap (×1)
- Frenzy (×1)
- Snare (×1)
- Defend (×1)
- Adroit (×1)
- Hunt (×1)
- Memory (×1)
- Orfash Curse Cards (×5)
- Unique Numbered Cards 1–5
- Enemy Buff Cards (×17)
- Tenacious (×1)
- Aware (×1)
- Rampaging (×1)
- Steadfast (×1)
- Quick (×1)
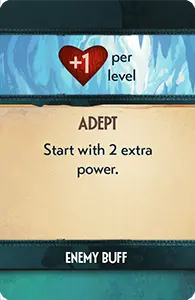
- Adept (×1)
- Two Lives (×1)
- Devious (×2)
- Deadly (×3)
- Venomous (×3)
- Powerful (×1)
- Hulking (×1)
Damage
Damage. This symbol represents the amount of damage dealt by combat cards, enemies, and other game effects.
Damaging Characters
When a character takes damage, this means they lose health, move the damage token on their health track accordingly. Outside of combat, unless specified, the active player decides how to split damage between the characters.
Damaging Enemies
The above attack deals 2 + the character’s perception skill (be sure to add their equipped ability cards).
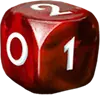
Combat die
Example: damaging enemies
When you deal damage, place damage tokens on an enemy equal to the basic damage number. Sometimes you also roll the combat die and add (or subtract) the result. Other effects can also add damage, such as when a skill is listed. For example, if strength is listed, the character performing the attack adds their strength skill total to the damage.
After you calculate your total damage, place damage tokens on the enemy grid. Distribute the damage over adjacent squares (think of it as one slash or hit).
Each square takes 1 damage to cover, except hearts with a value of 2 or more. For example, a 3-value heart would require 3 damage to cover, though you still only place 1 damage token on the square.
Damage cannot be placed diagonally, and you cannot place damage on squares that already have a damage token. However, you may change directions when placing damage. For example, a T shape or any other shape is allowed, as long as all squares are adjacent.
Placing a damage on a square disables all enemy abilities there, such as add power or end of round abilities.
Splash Damage
When placing damage on an enemy card, you may place some of it on adjacent enemy cards as long as it follows the damage-adjacency rule (this is why enemy card grids are lined up exactly). At least half of the damage (rounded up) must be dealt to the enemy card that you originally targeted. Only the first enemy counterattacks, not any enemies that you place splash damage on. Thematically, it represents using the chaos of battle against your enemies. Enemy block does not apply when the enemy takes splash damage.
Damage Tokens
Damage tokens are used to track:
- Each character’s current health
- Damage on enemies
- The amount of threat on some event cards
Defeat
Your main goals in Sleeping Gods: Distant Skies are to find dormant totems and rejuvenate them, find lost passengers, and survive the dangers of the Wandering World. You are defeated when all 5 characters reach 0 health, but that is not the end of your journey.
When you are defeated, return to the map (if you were defeated while exploring), restore all characters’ health to full, regain all stamina, and remove all status effects. Then cross off 3 camps and mark 1 defeat box on your journey log.
If you are defeated during one of the end stories (starting on 120), simply mark 1 defeat, restore all character health to full, remove all status effects, regain all stamina, and read from the beginning of 120 again, repeating this until you finish the game.
Difficulty
When you start a campaign, mark your selected difficulty on the journey log. There are 3 difficulty levels: easy, normal, and hard. The differences are described below.
Easy. When playing easy mode…
- Draw 3 ability cards per turn (instead of 2).
- When you camp, restore 6 health per character (instead of 2).
- Enemies start with 1 fewer power.
Normal. This is the standard and recommended way to play the game, especially if you’ve already played the original Sleeping Gods. When setting up the event deck, remove 8 random level 1 event cards.
Hard. When playing hard mode…
- To succeed on challenges, you must exceed the challenge number (instead of meet or exceed).
- When setting up the event deck, remove 14 random level 1 event cards.
- Also, when setting up each combat, shuffle the deck of enemy buff cards and deal 1 card to each enemy.
If you’re finding the game too easy or too difficult while playing, you can change your difficulty level at any time. Just be sure to mark the change on the journey log. The point of Sleeping Gods: Distant Skies is to have a fantastic adventure. It’s designed with story and experience in mind, so if you’re not having a good time because of the game’s difficulty, do not hesitate to adjust it.
Draw Fate
This card has a fate number of 8.
When the game instructs you to draw fate, you draw the top card of the ability deck, check the fate number in the top left corner, and immediately discard it.
If you run out of ability cards to draw, shuffle the discard pile and make a new pile. If there are no ability cards left at all because they are either equipped or in players’ hands, every player must immediately discard all their ability cards in hand except 1 to make a new ability card draw deck.
Fate Number Frequency
| Fate | Number of Cards |
|---|---|
| 1 | 5 |
| 2 | 7 |
| 3 | 8 |
| 4 | 10 |
| 5 | 10 |
| 6 | 10 |
| 7 | 10 |
| 8 | 2 |
| Fate | Number of Cards |
|---|---|
| 5 | 10 |
| 6 | 10 |
| 7 | 10 |
| 8 | 2 |
End of Turn
After you complete an action, if the pocket watch is on the last space on the time track, your turn ends.
Check for TURN END effects on any active event cards and follow the instructions, then return the pocket watch to the “turn start” space on the track. Pass the active player token to the player on the left. That player now starts their turn and they control Claire Smith.
Ending Your Turn Early
Bonus time token
You may choose to end your turn early if the pocket watch is on the second-to-last space on the time track. If you do, give the bonus time token to the player to your left. On their turn, the next player may spend the bonus time token as 1 extra time when taking actions.
Place the pocket watch here at the end of your turn.
You may end your turn when on this space if you want. If you do, give the next player the bonus time token.
When on this space, after completing your final action, move to step 4 to end your turn.
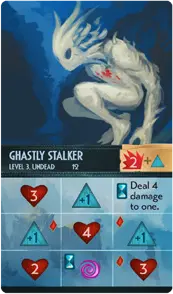
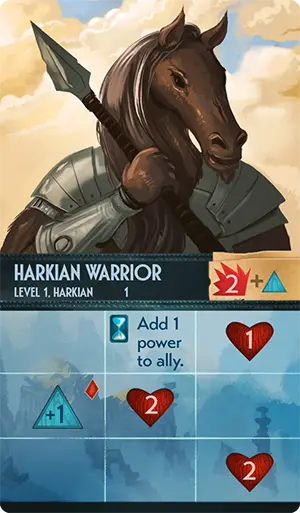
Enemy Cards
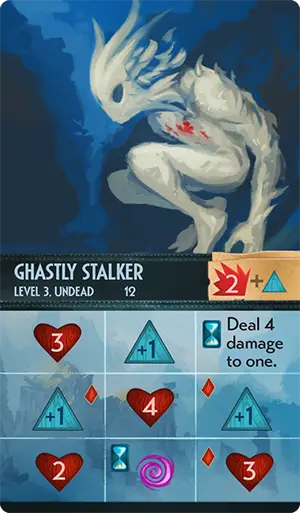
- Name, Level, Type, and Number
 Synergy. When you cover a square that has a synergy icon, you gain a synergy token. You must immediately place it on another character. That character can use it to activate a synergy ability on a combat card. Characters can have multiple synergy tokens, and you can also return them to the supply without using them.
 Health. Each heart must be covered to defeat an enemy. This heart requires 2 damage to cover. You must use 2 damage at once (it cannot be split between 2 attacks).
- Add Power. Each round, this icon (when uncovered) gives this enemy 1 additional power token. Keep power tokens on the picture section of the card.
- End of Round Ability. At the end of each combat round, uncovered abilities with the hourglass symbol activate.
 Counterattack Damage. This enemy deals 2 damage plus 1 per power token on the card immediately after a character attacks.
Enemy Abilities
Add Power to Ally (or Self)
In the enemy phase, add the specified power to 1 other enemy card (or self, if specified).
Allies deal +1/+2 damage
All other enemy cards deal +1/+2 damage when counterattacking while this ability is active.
 Block X
This enemy blocks the specified damage each time a character deals damage to it, until this ability is disabled. Enemy block does not apply when the enemy takes splash damage.
Combat Die Always Rolls a −1
The combat die always has a result of −1 until the ability is disabled.
Counter Deal 1 Dam. to All
Each time this enemy is attacked, it deals the specified damage to each character (in addition to its counterattack).
Deal X Damage to All
In the enemy phase, deal the specified damage to each character.
Deal X Damage to One
In the enemy phase, deal the specified damage to one character (the active player chooses).
Discard Ability
In the enemy phase, discard 1 equipped ability card from a character (the active player chooses which card to remove).
First Strike
This ability is active until disabled. Any time a character attacks this enemy, the enemy counterattacks first.
 Frighten
In the enemy phase, 1 character gains 1 frightened status token (the active player chooses).
Heal Self (or Ally) X
In the enemy phase, this enemy removes the specified number of damage tokens from itself (or an ally). The active player chooses which damage tokens are removed. Each damage token is treated as 1 (it doesn’t matter how many hearts the token covers). For example, a “Heal Self 1” could remove a damage token from a 3-value heart.
Lose 1 Resource
In the enemy phase, return 1 resource to the supply.
 Low Morale
In the enemy phase, 1 character gains 1 low morale token (the active player chooses).
 Madness
In the enemy phase, 1 character gains 1 madness status token (the active player chooses).
 Venom
Venom
In the enemy phase, 1 character gains 1 venom status token (the active player chooses).
 Weaken
In the enemy phase, 1 character gains 1 weakened status token (the active player chooses).
Enemy Buff Cards
Enemy Buff Card
Enemy buff cards are only used for hard difficulty.
Each enemy buff card adds health and an ability to the enemy. When placing attack damage on an enemy, you may place any or all of it on the buff card to account for the extra health (pretend it is adjacent to every square in the grid), which you must also “cover” to defeat the enemy. Even if you cover a buff card, the ability on the card still applies until the enemy is defeated.
Bosses
When fighting a boss, use an enemy buff card for each zone, but treat the “+1 heart per level” as shared among all the cards.
End of Round (Enemy Phase) Combat Round, Step 2
Following combat step 1, Attack & Counterattack…
If any enemies remain after 4 combat cards have been played (or fewer, if characters are at 0 health), they now activate their end of round abilities (indicated by the hourglass symbol). Players can choose to move to the end of round phase even if they haven’t played 4 combat cards.
- First, discard all played combat cards on characters.
- Each remaining enemy then gains power and activates their end of round abilities, from left to right. When gaining power, add power tokens to the picture area of the enemy card equal to uncovered power growth symbols on the card.
- The active player decides which characters are affected by enemy abilities.
Example: Equipping Ability Cards
The cost to equip the Herbalist card is 1. Claire already has another SAVVY ability card equipped, so the cost increases by 1. You discard 2 other ability cards from your hand and place the Herbalist card beneath the Claire character board so that the top half is hidden.


- Character Basic Skills
- Claire now has a total of 3 SAVVY because she equipped these 2 ability cards. When she spends 1 stamina to participate in a SAVVY skill challenge, she contributes 3 total SAVVY.
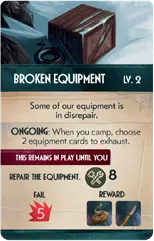
Events
In step 2 of your turn, you have an event. Draw the top card of the event deck and read it aloud. Apply the effect or complete the challenge. If the deck is exhausted, reshuffle the discard pile.
You cannot ignore an event card. You must complete it immediately, unless it says “this remains in play until you…” In this case, place the card face up to the side of the atlas. Any “ongoing” effects apply. If there is a “turn end” effect, it activates at the end of each player’s turn until it is completed. You can complete an event in play like this at any time on your turn.
If you take any negative effects, unless the card specifies, the active player decides how to distribute the damage and status tokens among the characters.
When you complete an event, discard the card.
Threat
Each time an effect says to “gain 1 threat,” place a damage token on the card. Some effects grow more dangerous or difficult the more tokens are on the card.
Click on the examples below for details.
-
Challenge. When you draw this card, you must perform a MOXIE 8 challenge immediately. If you fail, you take 4 damage and gain madness (split among the characters as chosen by the active player). Whether you fail or succeed, you gain 1 sand honey.
-
Immediate Effect. When you draw this card, there is no challenge, only an effect. Miguel takes 2 damage and gains venom. Then you gain 1 sand honey and discard this card.
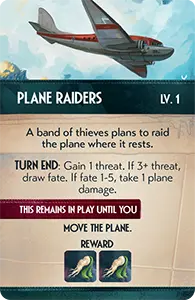
-
Turn End. This effect applies at the end of each player’s turn until the event is completed and discarded. If this card has 3 or more threat (damage tokens), draw fate. If fate is 1–5, you must take 1 plane damage.
You must move the plane to complete this event.
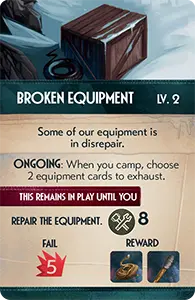
-
Ongoing. This effect applies until the event card is completed and discarded.
To complete this event, you must perform a CRAFT 8 challenge. If you fail, you take 5 damage. Whether you fail or succeed, complete this event and gain the reward.
Example: Challenge
Claire must complete a CUNNING 9 challenge.
- She spends 1 stamina.
- Claire has 1 basic CUNNING plus 1 equipped CUNNING, for a total of 2.
- She draws a fate of 8. Her total skill is 10 (2+8=10). She succeeds.
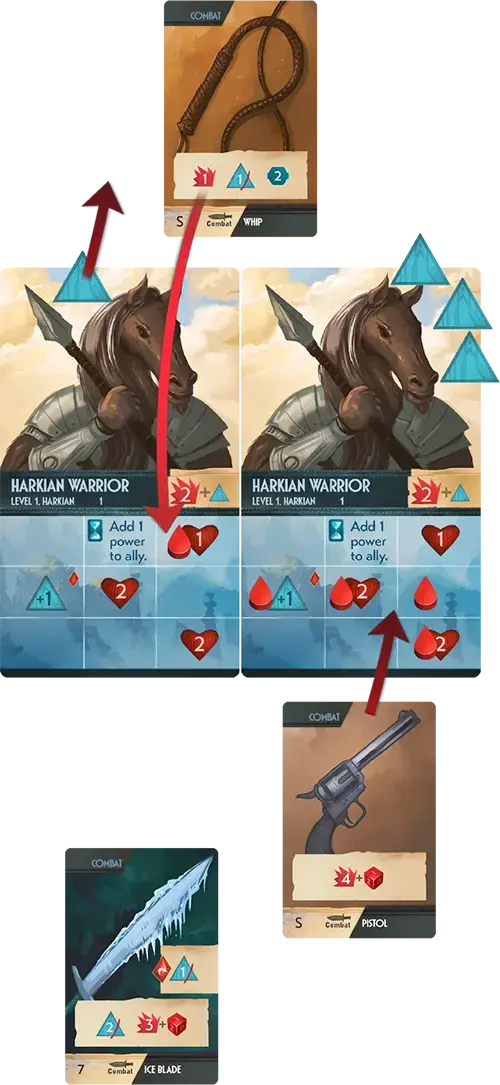
Example: Combat
Zoey and Cid start the third combat round against 2 Harkian warriors. In previous rounds, they defeated 3 other enemy cards. They each played 2 combat cards in the previous round, and so they each draw 2 combat cards (they each now have 3 cards in hand). Zoey controls Claire, Ed, and Jessie. Cid controls Ezarius and Miguel.
The first Harkian has 1 power. The second has 3 power. Zoey starts by playing the whip on Ed. She targets the first Harkian, dealing 1 damage and removing 1 power token. The Harkian counterattacks and deals 2 damage (because there are no longer any power tokens on the card). The whip gives Ed 2 block, so Ed takes no damage.
Cid now plays the pistol on Miguel, targeting the second Harkian. He rolls the combat die for a result of 2, dealing 6 damage. When he places the damage, he covers a square with a synergy icon, so he gives a synergy token to Claire. The Harkian counterattacks and deals 2+3 damage (because he has 3 power tokens). Miguel takes 5 damage.
Zoey now plays the Ice Blade on Claire, targeting the second Harkian. Claire has a synergy token, so Zoey discards it to activate the Ice Blade’s synergy ability, which gives her 1 extra “remove power” ability. She removes 3 power tokens from the Harkian. Then she rolls the combat die for a result of −1. 3−1=2, so she deals 2 damage to the Harkian, covering the final heart and defeating him. Even though the enemy is defeated, the Harkian makes one final counterattack, dealing 2 damage to Claire (because there are no longer any power tokens on the card).
Cid plays 1 final combat card on Ezarius and defeats the remaining Harkian, taking 2 damage in the counterattack. Combat is now over.
Example: Damaging Enemies
- An attack that deals 5 damage could be placed like this, using 1 of the damage as splash damage on an adjacent enemy.
- This square takes 2 damage to cover.
Example: Fly Action
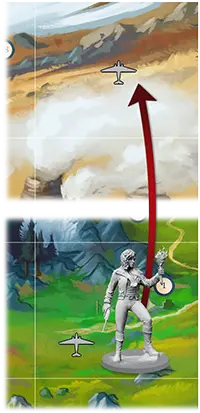
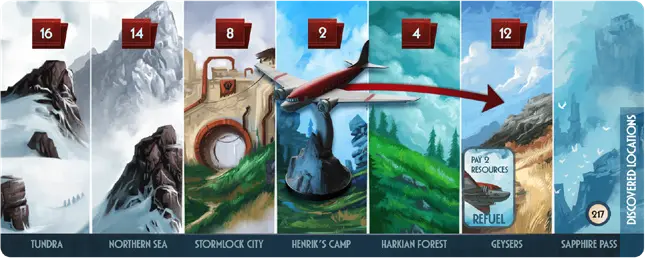
You want to fly from Henrik’s Camp to Geysers
The plane is moved two spaces on the flight board — from Henrik’s Camp to the Geysers landing space.
Claire correspondingly moves on the atlas — from the Henrik’s Camp space on page 2, to the Geysers space on page 12.
You record the loss of 1 fuel on the airplane card.
You draw fate and get a 5, then add the number of spaces that the plane moved on the flight board for a total of 7.
You check the table, see that the plane takes 1 damage, and record it on the airplane card also.
Action: Explore
If the Claire figure is on a square with a numbered location, you may explore it, which costs 2 time. Open the storybook to the number listed on the location on the atlas. Read the first section of text in the story (read aloud unless you are playing solo). At the end of each story section, the following may occur:
-
Make a choice. This may include a challenge or combat. After completing the challenge or combat (if any), turn to the listed story number. Gain any listed rewards.
-
If you fail a challenge, you suffer negative effects. These are listed in italics. Sometimes, if you fail a challenge, you must turn to an alternate story number (this is listed in the failure description). If there is no alternate story number listed, continue to the story listed in the parenthesis below the failure description.
-
The end of each explore action is indicated by the phrase, “Return to the map.” This means this explore action is over, and the active player continues their turn as normal.
Do not read ahead or turn to any further story section until you have made your choice/completed your challenge.
Sometimes the storybook instructs you to cross off a location on your campaign map on the journey log sheet. If so, you cannot visit the location again in the same campaign.
Obstacles
Sometimes the storybook lists an obstacle and specific instructions to pass it and keep reading. Obstacles in the storybook have different negative effects than when they are encountered on the atlas.
Story Example
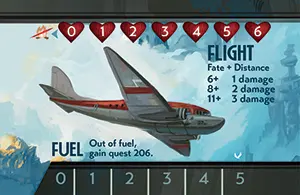
Action: Fly
Flight board


Example: fly action
This action costs 2 time and allows you to move the plane from one landing place to another. Claire must be on the same landing place as the plane figure (Claire on the atlas, the plane on the flight board). The plane must have at least 1 fuel and 1 health.
Choose a destination on the flight board and move the plane and Claire figure to that landing place. Place the plane and Claire on their corresponding flight board and atlas landing places (if traveling to a distant location, place both on the distant location).
Lose 1 fuel. Then draw fate and add the number of spaces the plane traveled on the flight board. Reduce the plane’s health according to the result:
| 0–5 | No damage |
| 6–7 | 1 plane damage |
| 8–10 | 2 plane damage |
| 11+ | 3 plane damage |
Refueling the Plane
When the plane is on the “Geysers” landing place you can, at any time, pay 2 resources to move the fuel slider to 5. The Claire figure can be anywhere on the atlas.
If you run out of fuel, gain quest 206, as listed on the airplane card.
The Plane at 0 Health
If the plane takes any amount of damage when it is at 0 health, you must cross off one of the camp symbols on your journey log (this represents the characters having to spend extra time repairing the plane).
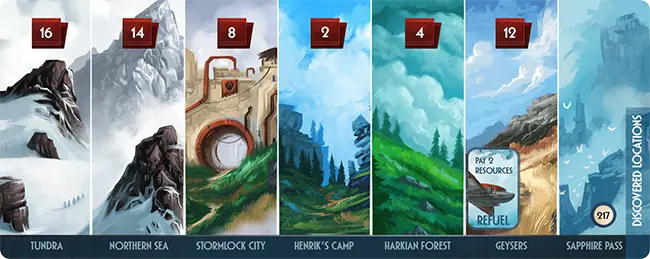
Distant Locations
The last space on the flight board, Sapphire Pass, is a distant location, which you can only reach with the airplane, and which only has one explore location.
As you play the game, you may gain new distant location cards. All of these cards are considered adjacent to the Sapphire Pass distant location and to one another.
If you’re on a distant location, you can spend 2 time to perform an explore action there, but you must use another fly action to return to the atlas.
Variant: Quick Landing
If you choose to play with this variant, when you perform the fly action, you may drop off Claire anywhere on the open atlas, not only on the landing place square. However, Claire must start on the landing place square as normal.
If playing with this variant, you may perform the fly action without moving the plane to a different landing location (for example, you could move Claire to a space on the same open atlas page). In this case, the plane’s distance is 0 when drawing fate to check for damage, but it still costs 1 fuel.
Ignore obstacles when taking this action (including on the space where you place Claire).
Flight Board
The flight board and airplane figure show where the plane is and where it can land. There are 6 landing places corresponding to squares on the atlas. The atlas page numbers are listed at the top of each space on the flight board.
- Landing Places. The names of each landing place.
- Atlas Pages. The page in the atlas with the corresponding landing space square.
- Geysers. You can refuel here by spending 2 resources.
- Sapphire Pass. Distant location number 217.
- Discovered Locations. Place new distant location cards here.
Health
Your character’s health is the amount of physical and mental damage they can sustain. When your character loses or gains health, move the damage token on the track accordingly. When the game says you take damage, this means you lose health. Sometimes this is also written as “-X health.”
Unless specified, the active player decides how to split regained health between the characters. A character can never have more than their max health.
Reaching 0 Health
When a character reaches 0 health, it means they are in a weak and vulnerable state. They’re still able to walk and talk, but they cannot assist in skill challenges, participate in combat, or activate any of their abilities until they have at least 1 health.
If all characters have 0 health, you are defeated.
A character with 0 health cannot take more damage. Outside of combat, if you assign damage to a character and they reach 0 health, you must assign the remaining damage to other characters. In combat, however, if an enemy deals damage to a character and the character reaches 0 health, any remaining damage is ignored.
If a character’s health reaches 0, you may not simply restore their health. You must also spend 1 time on the time track when moving their health from 0 to 1. This means you cannot restore health to a character at the end of your turn or during an explore action.
Examples: restoring characters from 0 health
Miguel is at 0 health, so you discard one ogroot to restore 1 health and spend 1 time.
You decide to camp while two characters are at 0 health. Cross off one camp symbol in the journey log and spend two time.
Three characters are at 0 health, so you spend 3 time, discard one tundra berry, and distribute the 8 health it restores amongst them as you desire.
Note: Since you must spend time, restoring from 0 health must be done in step 3 of the turn. Therefore, it can’t be done during combat or while exploring.
Enemy Health
Enemy health is represented by hearts on their grid. When you damage an enemy, place damage tokens on the enemy grid. If every square containing a heart symbol is covered, the enemy is defeated.
Airplane Health
The airplane also has health that is tracked on the airplane card. If the plane takes damage when it is at 0 health, you must cross off a camp symbol on your journey log. The plane regains health when you repair it.
Icons
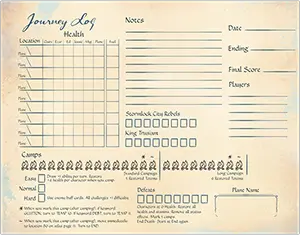
Journey Log and Campaign Map
Journey Log
Campaign Map
When you start a new campaign, record the players’ names and name your plane on a new journey log sheet. Also mark if you are playing easy, normal, or hard mode. Use this sheet throughout the campaign to write notes, track camps, mark defeats, and mark boxes on the Stormlock City Rebels and King Trusiam tracks. Also use this sheet when you need to save the game.
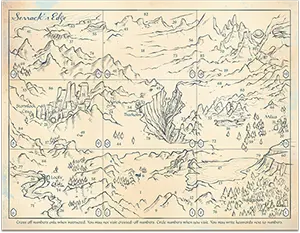
On the back of the journey log is a map of the northern land you’re exploring, a part of the Wandering World called Serrack’s Edge. Author’s Note: This place is to the far northwest of the map of islands in the original Sleeping Gods. It is highly recommended to write notes on this map to help you remember things, such as where you’ve been, where you want to return, and more. If you know that a certain location requires a keyword, you can write this down as well so you know where to return when you gain the keyword later. You can also use notes from previous campaigns when you play a new campaign.
If you’re ever instructed to cross off a location on this map, you cannot return to explore it again in the same campaign.
Sleeping Gods: Distant Skies can only support 1 campaign at a time. This is because you need to keep track of which quest cards you have completed, character status effects, adventure cards you own, and more. You may reset the game for a new campaign at any time.
Not an Attack
If a remove power ![]() or damage
or damage ![]() ability says, “Not an attack,” it means that it can be performed at any time during combat and does not trigger a counterattack from an enemy. It is performed separately from a combat card, although you must follow adjacency rules when placing damage this way.
ability says, “Not an attack,” it means that it can be performed at any time during combat and does not trigger a counterattack from an enemy. It is performed separately from a combat card, although you must follow adjacency rules when placing damage this way.
Power
-

Power adds to the damage that enemies deal when they counterattack.
-
Power tokens are used to track an enemy’s current power.
-
Add power. Add power tokens to enemies during combat setup and each combat round during the enemy phase.
-
Remove Power. Remove the specified number of power tokens from the target enemy before they counterattack.
Quest Cards and Keywords
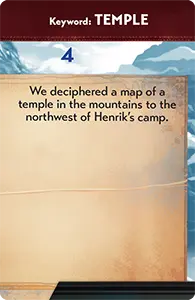
- Keyword
- Quest Number
- Quest Description
When the storybook says “Gain quest X,” retrieve the matching quest card from the magnetic box and place it face up near the atlas. Keep all other unclaimed quests in the box secret and in order.
When the storybook says “Lose quest X,” or “Complete quest X,” place the specified card in the completed quest box. Once quests are in this box, you cannot retrieve them (unless you are resetting the game for a new campaign).
Keywords
Some story sections list keywords that you must have in order to read them or to make specific choices. All keywords you have are listed on quest cards you own.
If a story paragraph starts with, “If keyword X, turn to X,” then you must follow these instructions if you have the keyword. If there are multiple keyword instructions at the start of a story, resolve them in order.
If a choice says “Requires keyword X,” it means that you must have a specific keyword to choose it. Even if you have the specified keyword, you are not forced to select that choice. You may select another choice.
Action: Repair
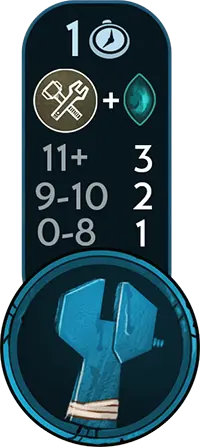
This action allows you to repair the plane. It costs 1 time. Claire must be on the same landing place as the plane figure (Claire on the atlas, the plane on the flight board).
Perform a CRAFT challenge. Restore the plane’s health according to the result:
| 0–8 | restore 1 plane health |
| 9–10 | restore 2 plane health |
| 11+ | restore 3 plane health |
Resetting for a New Campaign
Follow these steps:
-
Return all adventure cards and quests to the magnetic box. Make sure all cards in each deck are in numerical order (starting with 1 when face down).
-
Return all tokens to the supply.
Resources
You can discard resources at any time to activate their abilities. Select a resource below for details.
Common Resources
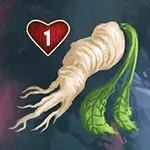
- Ogroot
-
Ogroot: Restore 1 health.
 Whiskey
-
Whiskey: Remove frightened or low morale.
 Torch
Torch-
Torch: Deal 1 damage (not an attack). The torch is also useful in some explore locations.
 Sand Honey
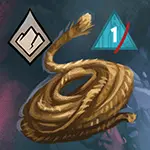 Rope
Rope-
Rope: Remove 1 power or ignore steep terrain.
 Meat
Meat-
Meat: Gain 1 stamina.
Quest Resources
 Jadeworm Egg
-
Jadeworm Egg: Restore 5 stamina.
 Ice Diamond
-
Ice Diamond: Deal 8 damage (not an attack).
 Fire Quartz
-
Fire Quartz: Deal 7 damage (not an attack).
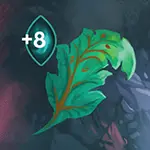 Gergon Leaf
-
Gergon Leaf: +8 to fate.
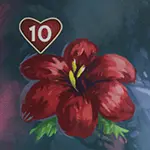 Bloodflower
-
Bloodflower: Restore 10 health.
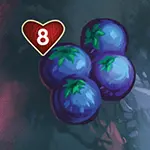
- Tundra Berry
-
Tundra Berry: Restore 8 health.
Resources are a shared. If there is a conflict about how to use them, the active player makes the final choice.
Setting up a Saved Game
-
Place the atlas in the center of the table and turn to the page of the location indicated on the most recent save line on the journey log sheet. Place the Claire figure on the listed location.
-
Place the action board near the atlas and the pocket watch at “turn start”. Place any resources from the large trough in the storage tray on the action board.
-
Set up each character with the equipped ability cards and status tokens from their individual bags. Distribute the character boards among the players as evenly as possible. Each player places their characters in front of them and sets health and stamina at the correct numbers.
-
Shuffle the ability deck and place it on the action board.
-
Place the event deck on the action board. Place the active events nearby (with any threat tokens, as indicated on your journey log sheet).
-
Shuffle the ability cards that were in players’ hands when you last saved and deal them out to the players as evenly as possible. Do the same for the adventure cards. Place the adventure card discard pile on the action board.
-
Place the deck of enemy cards near the board. Place the combat deck board nearby.
-
Place all of your current quest cards near the board. Place the magnetic box of quests and adventure cards nearby.
-
Place all remaining tokens and the storybook nearby.
-
Place the flight board and plane near the atlas. Place the plane on the last recorded location.
-
Decide who will be the first player and give them the active player token.
Saving the Game
At the start of any player’s turn, you can decide to pause the campaign and save your game. This is a way to pack up the game components and keep track of your progress so you can continue another time. If you have a dedicated space to keep the game set up, you do not need to save the game. Follow these steps:
-
On the next available save line on your journey sheet, write down your location (it’s best if you end on a square with an explore number), the plane’s location, each character’s health, and the plane’s health and fuel.
-
Place each character’s status tokens and equipped ability cards in a separate bag with their standee and current stamina (you do not need to store the character boards in these bags).
-
Place all of your resources, adventure cards, combat cards, ability cards in hand, character boards, and quest cards in the large trough in the storage tray. When placing adventure cards in this trough, put them in their own bag, and put any from the adventure card discard face down in the pile, while keeping the remaining cards face up (place a status token at the top of the pile to indicate the top). Place the event deck in its own bag, with active events face up on the top of the pile. If you need to, you can write how many threat tokens they have on your journey log sheet.
-
Clean up the rest of the game components.
Campaign Final Score
When you finish a campaign, calculate your final score based on the following:
- 2 points per adventure card you have (don’t include starting adventure or combat cards). Restored totems and passengers are worth 5 points instead of 2.
- 1 point per quest card (including all the cards in the completed quest box).
- 1 point per equipped ability card.
- 1 point per 4 remaining common resources.
- 1 point per remaining quest resource.
- 10 points if you reached an ending in the campaign.
- −10 points per defeat.
- +10 points if playing normal OR +20 points if playing hard mode.
- +10 additional points if playing instant death (in any difficulty mode).
Campaign Setup (EasyNormalHard Difficulty)
You can change game difficulty in settings .


Place the atlas in the center of the table and turn to page 2. Place the Claire Smith figure on the square with location 6.
Place the action board to the right of the atlas. Place the pocket watch on “Turn Start.” Place 1 meat, 1 ogroot, 1 torch, and 1 rope on the action board next to the time track; you start the game with these resources.
Place the Claire Smith character board in a place accessible by all players. Distribute the remaining 4 character boards among the players as evenly as possible. Each player places their character board(s) in front of them. Place the character standees nearby. Place a damage token on each character’s health track, on the highest space. Place 3 stamina tokens on each character board.
-
Shuffle all event cards together to form the event deck. Remove 8 random lv.1 event cards and place them back in the box. Shuffle the remaining event cards together to form the event deck. Remove 14 random lv.1 event cards and place them back in the box. Shuffle the remaining event cards together to form the event deck. Shuffle the ability deck. Place the event and ability decks to the left of the action board.
Retrieve the starting adventure cards. These include combat cards, which are a specific type of adventure card. Shuffle the starting combat cards and place them in a deck, face down, on the combat deck board. Randomly distribute the remaining starting adventure cards among the players as evenly as possible (if playing solo, you take all the cards).
Place the flight board above the atlas. Place the airplane figure on the “Henrik’s Camp” space. Place the airplane card near the flight board. Place sliders on the plane health track and the fuel track, each on the highest space.
Place the magnetic card box that contains adventure and quest cards nearby. Important: Do not change the order of cards in the quest card and adventure card decks, and do not look through the cards unless instructed.
Place the deck of enemy cards near the board, face down. Important: Do not change the order of cards in this deck, and do not look through this deck unless instructed. Shuffle the enemy buff deck and place it near the enemy deck.
Place the storybook near the board.
Organize the resources and place them nearby.
Draw 4 ability cards and distribute them among the players as evenly as possible (if playing solo, you take all the cards).
Place the combat tray (with damage, synergy, and power tokens) near the atlas. Place the combat die and status tokens nearby.
Retrieve a new journey log sheet for your campaign. Record the date, all players’ names, and that you’re playing at EasyNormalHard difficulty.
Give the active player token to the player who controls Ezarius.
Skills
There are 6 types of character skills in the game.
Skill icons on equipped ability cards add to your character’s basic skills.
Temporary skill icons from character, ability card, or adventure card abilities can be to used in a challenge, or to boost a combat card.
-

Strength: Used when anything requires physical effort or endurance.
-

Perception: Used to search, use hand-eye coordination, detect, or use senses. Also used to hide and sneak.
-

Savvy: Used when anything requires knowledge, either from study or experience.
-

Craft: Used when something must be built, repaired, taken apart, maintained, or refined.
-

Cunning: Used when you must convince, lead, speak, deceive, devise, or plot.
-

Moxie: Used to withstand stress, intimidate others, overcome fear, or act with boldness.
Stamina
Stamina token
Each character can have a maximum of 3 stamina, which they can spend to participate in challenges and activate abilities. When a character spends stamina, remove a stamina token from their character board.
Status
There are five types of status tokens in the game. When a character gains a status, place the matching token on their board. Each character can have multiple types of status tokens, but may not have more than one of each type. Characters gain status tokens in stories and combat. Unless specified, the active player chooses which character takes each status token. Characters can remove status tokens through character and adventure card abilities.
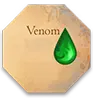
-
Venom: The character loses 1 health at the start of each player’s turn. Once a character reaches 0 health, ignore the token until the character has at least 1 health.
-
Frightened: You cannot play combat cards on this character.
-
Weakened: −2 to each of the character’s skills.
-
Madness: The character cannot use any of their character board abilities. All of the abilities on their equipped ability cards have no effect (but the skill symbols still apply).
-
Low Morale: You must pay 2 stamina to use the character in skill challenges (instead of 1).
Storage
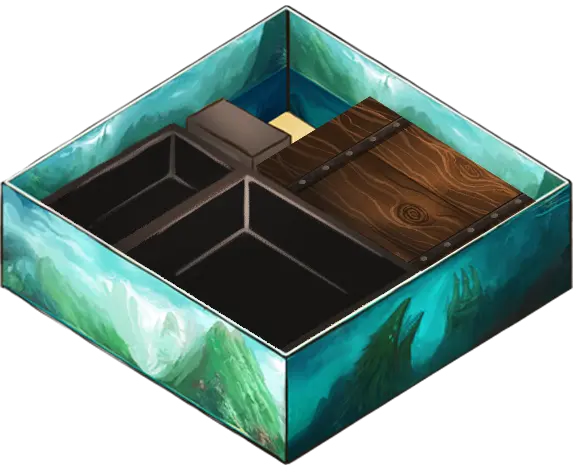
- Storage Tray:
- Unused enemy buff/curse cards
- Unused status tokens
- Combat die
- Ability card deck
- Damage, Power, and Synergy tokens
- Enemy card deck
- Other components
- Airplane
- Pocket Watch
- Bonus Time Token
- Resources
- Store components specific to the current campaign in the large trough:
- Acquired adventure cards
- Ability cards in hand
- Acquired resources
- Current event deck
- Current quest cards
- Characters: stamina, equipped ability cards, status effects
- Completed Quest Box
- Magnetic Card Box:
- Unused adventure cards and quest cards (in order)
- Unused event cards
Story Components
You’ll discover how these components are used as you explore the Wandering World. Details are found in the Storybook.
-
Orfash Curse Cards
-
Airplane Token
-
Helthark Token
The Supply
The supply refers to the resources or components your characters do not possess. When you are told to “pay,” “discard,” “lose,” or “remove” something, it means to return it to the supply.
All components are limited, which means that if you run out, you cannot gain or use more, with two exceptions: damage tokens and power tokens. If you run out of these, use something else to keep track.
Struggling to Survive?
Remember to equip ability cards. Though it costs more, stacking a character with multiple ability cards with the same skill will make you more efficient and you won’t need to camp as much.
Most of the time, when you’re presented with an overwhelming combat, you have the option of running away. A level 6 combat is one of the lowest levels in the game, but even that can knock you out if you’re not prepared. Run away if things aren’t going your way and come back when you’re ready to fight. Search for more combat cards and customize your deck to be as effective as possible. You only need to have 14 cards in the deck; remove the combat cards that are less powerful.
If you are defeated, don’t worry. The game was designed knowing this might happen sooner or later. Take what you learn and continue. Even if you end the campaign with fewer goals achieved than you hoped for, you’ll be able to unlock new cards that will help you in the next campaign. Every ending in the storybook is a legitimate one, even if it isn’t quite what you had in mind when you started.
Sleeping Gods: Distant Skies is all about balancing resources. Don’t use characters on every challenge. Sometimes it’s better to just draw fate without spending stamina if you can afford to take the failure consequences. It’s harder to restore health than stamina, but it’s okay to lose health as long as you’re balancing your losses. Failing a challenge often moves the story forward even if you take some consequences.
The first map is the easiest map in the game, despite a few surprising dangers hidden here and there. The farther you venture from the starting map, the harder things get.
Synergy
Synergy icon
Synergy tokens
When you cover a square on an enemy grid that has a synergy icon, you gain a synergy token. You must immediately place it on another character.
That character can spend it to activate a synergy ability on a combat card (in addition to the other effects on the card). Each synergy ability can only be activated once each time you play the card.
Characters can have multiple synergy tokens, and you can also return them to the supply at any time without using them.
After combat, return all synergy tokens to the supply.
Totems
One of your main goals is to find rare totems that have the power to return you to Earth.
Restoring Dormant Totems

As you play the game, you’ll obtain quest cards that represent dormant totems, tools of the gods that have lost their power. You can restore their power by discarding specific combinations of quest resources you own (these are listed on each quest card). You can do this at any time. When you restore a dormant totem, you place the quest card in the completed quest box and gain the specified totem adventure card.
Any higher level quest resource can be used in place of a lower quest resource. For example, you can use 1 fire quartz in place of 1 bloodflower, etc. The ranking of quest resources from highest to lowest is: jadeworm egg, ice diamond, fire quartz, gergon leaf, bloodflower, tundra berry.
-
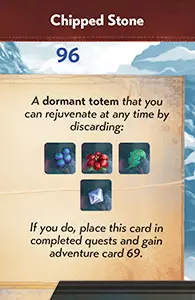 Complete this quest card…
-
…to receive this restored totem adventure card.
Action: Travel
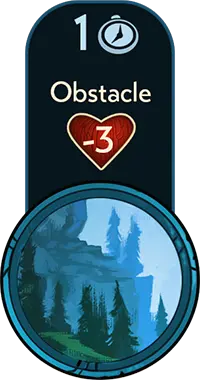
Atlas Icons
-

Cold Obstacle
-

Steep Terrain Obstacle
-

Treacherous Water Obstacle
-

Landing Place
-

Explained during play
Use this action to move the Claire Smith figure on the atlas. Each page of the atlas is divided into a square grid, and each square you move costs 1 time. You may only move to squares that share an adjacent border; you may not move diagonally.
Squares adjacent across the spiral binding are considered adjacent for the purposes of travel.
Obstacles
When you reach a square with an obstacle, you must either immediately use an adventure card or ability, or discard a resource that lets you ignore the obstacle. If you cannot, you must take 3 damage (divided among the characters how you like).
Travel Example: You spend 2 time to move 2 squares to the east. Then you spend a further 2 time to move 2 squares to the north. The final square has a water obstacle. You do not have an ability, adventure card, or resource that allows you to ignore it, so you take 3 damage.
Edge of the Map
If you reach the edge of the map and want to keep going in the same direction, you may do so as long as there is an icon on the page indicating which page to turn to. Follow these steps:
-
First, remove the Claire figure from the map.
-
Turn to the page in the atlas specified on the edge you are crossing and place the Claire figure on the adjacent space on the new page.
-
You always enter the map on the opposite side of where you left. For example, if you cross the northern edge of the atlas, you enter on the southern edge on the new page, etc. You must start on the new page on the square that would be adjacent were the two pages placed next to each other.
Example: You start on page 2 and move north to page 10. You leave page 2 on the first square from the left edge. On page 10, you should start on the bottom of the page, on the first square from the left edge.
Player Turns
Starting with the first player, players take turns in clockwise order. Follow these steps on your turn:
-
Draw 32 Ability Cards. You can equip ability cards to characters at any time, or discard them to add to any challenge.
-
Resolve an Event. Draw and resolve an event card. Events may present a choice, a challenge, consequence, or other effect.
-
Perform Actions. Each action (except camp) requires you to move the pocket watch on the time track. You may perform the same action multiple times in one turn.
-
End of Turn. After you complete an action, if the pocket watch is on the last space on the time track, your turn ends.
- Check for TURN END effects on any active event cards.
- Return the pocket watch to the “turn start” space on the track.
- Pass the active player token to the player on the left.
Veteran Mode
If you’re an experienced Sleeping Gods player and you want it to feel a bit more like the original, or you want a challenging adventure with more tension, use this mode.
Implement the following changes to the rules at any difficulty:
Time Crunch Events. Separate the event cards by level and shuffle them, placing them face down near the play area. To create the event deck, take 2 cards of each level and shuffle them together, placing the deck face down. The deck size should be 6 cards total. When the deck runs out, cross off a camp, but DO NOT take a camp action. Then make a new event deck following the same procedure. If a quest card instructs you to place it in the event deck, simply place it at the bottom of the current deck.
Fast Enemies. Enemy cards each now attack at the end of each round (in addition to their counterattack). The active player decides the target of each enemy end-of-round attack. However, now enemies do not counterattack when they are defeated.
Ability Card Limit 5. Characters now have a limit of 5 equipped ability cards. However, characters can discard equipped ability cards to gain +1 of the card’s skill during a challenge or attack. This can be done as a last step during a challenge or attack, after taking advantage of the card’s ability or using its skill symbol by paying 1 stamina.
Dangerous Camping. When camping, if on an atlas space with any of these locations, you can safely camp: 1, 14, 21, 24, 29, 34, 38, 54. If camping anywhere else, draw fate. If 1-5, wild beasts attack you in the night: each character takes 2 damage and you lose 3 resources.
Wandering Encounters
When you explore certain locations, instead of reading a story passage, you open the storybook to an illustration of the scene. This is called a wandering encounter. Each player then simultaneously chooses where to place their character standee(s) on the available actions there.
Each wandering encounter action can only be taken once, although up to two characters can be placed on the same action to help succeed at the challenge. Even if two characters are placed on the same action, any listed rewards are only gained once.
Each character can only visit one action.
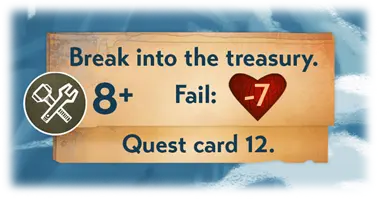
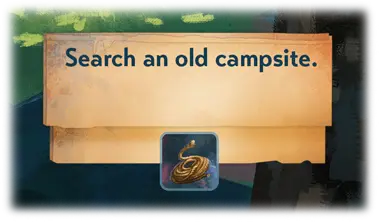
Most actions have a challenge or other requirement that you must complete, listed beneath the name of the action. A character must spend 1 stamina as usual to add their skill symbols to the fate draw for challenges, or they can choose not to and simply draw fate.
The reward for each action is listed at the bottom of the action. If the reward you gain is a quest card in a wandering encounter, read it silently to yourself. You can share what happened in your own words with the other players after reading, role-playing your character if you choose, or simply stating a summary. If two players participate in the same action, they both read. If a quest card says to discard it after reading, place it in the completed quest box; you can no longer gain the card in the same campaign.
After all characters have completed their chosen actions (or you choose to end the encounter), remove the character standees from the page and return Claire to the map. Unless the location is crossed off, you may use another explore action to return to a wandering encounter.